Welcome to the Rushworth Cemetery Map and Burial List website
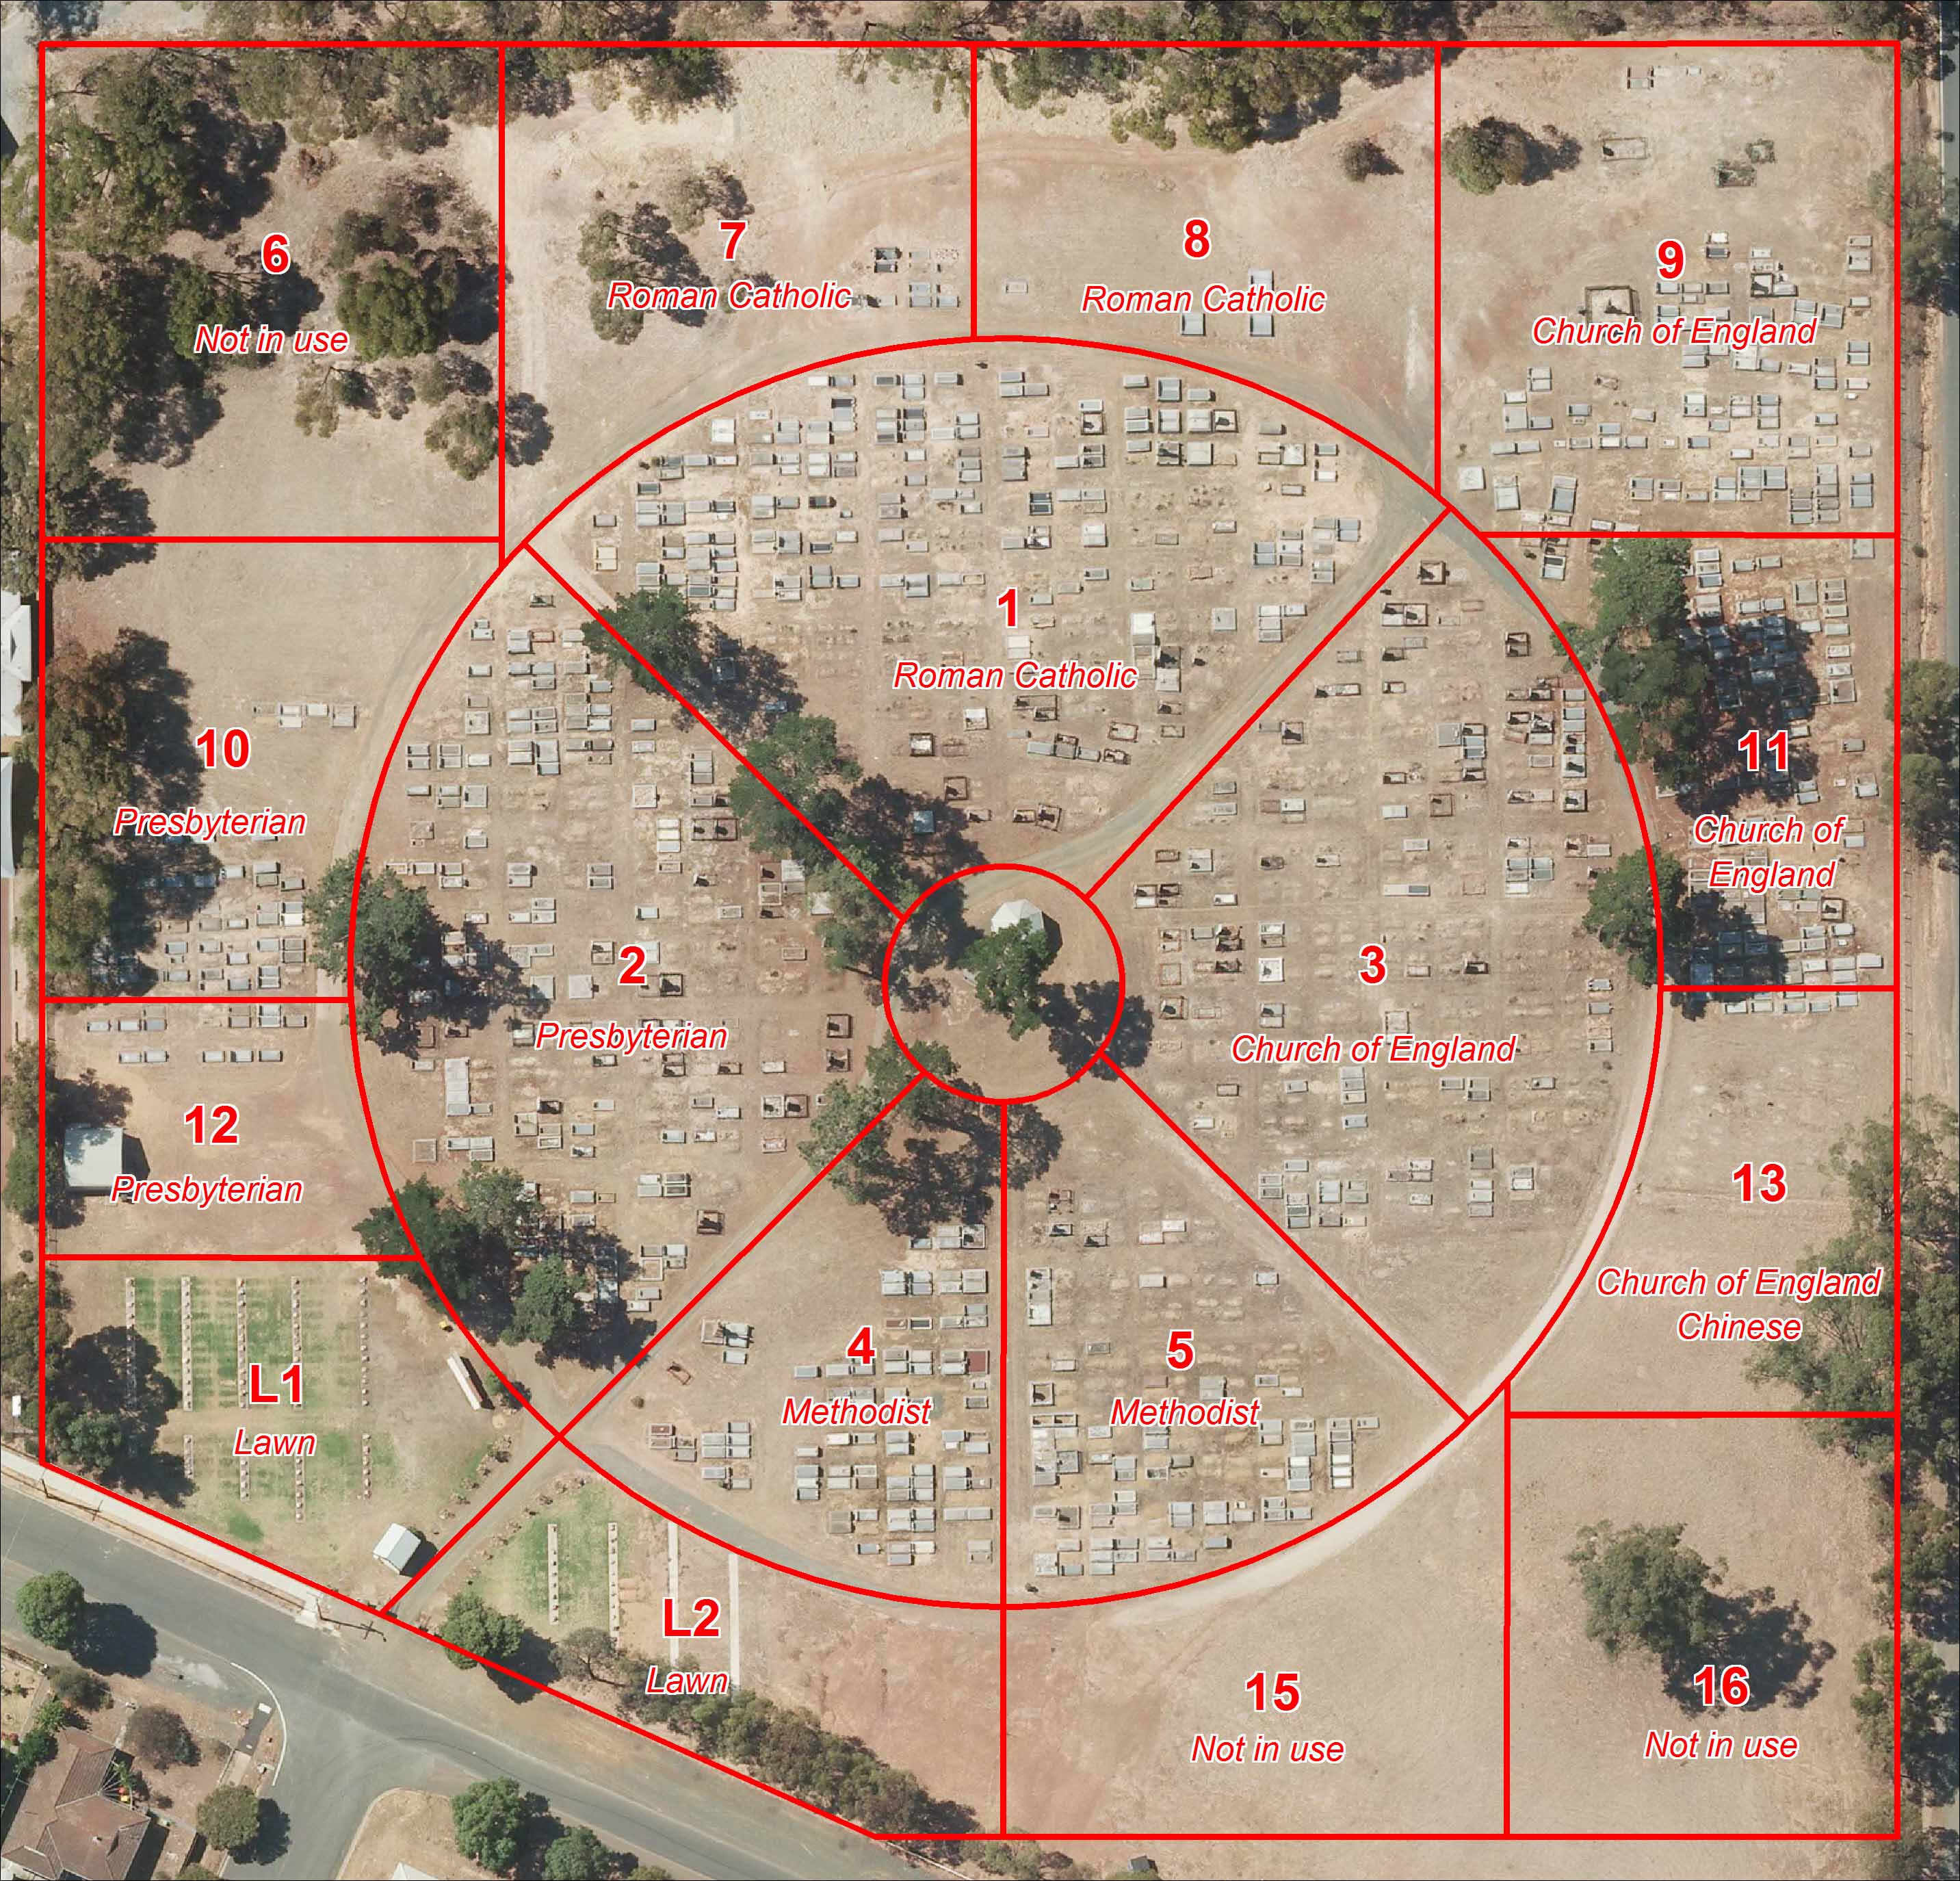 |
Photos & Maps:
Entire Map Section 6 (Not in Use) Section 15 (Not in Use) Section 16 (Not in Use)
Wall Sect 1
Wall Sect 2 |
|
Photos & Maps:
Entire Map Section 6 (Not in Use) Section 15 (Not in Use) Section 16 (Not in Use)
Wall Sect 1
Wall Sect 2 |
Please Note: Photos are only of graves with Tombstones present and are numbered according to the grave site.